
We had a surprise January warmup to 70°F (21°C) in Tennessee today, so it was finally the perfect time to paint the trailer’s frame with some automotive chassis rust inhibitor, after weeks of waiting for cooperative weather.

While waiting to paint, we had a welder friend repair some parts of the frame that had extensively rusted – mostly around the entry door, where the worst water damage had occurred. We even had to remove some rivets and pull back a piece of the outer skin to access the frame in that area. That was just a little terrifying.

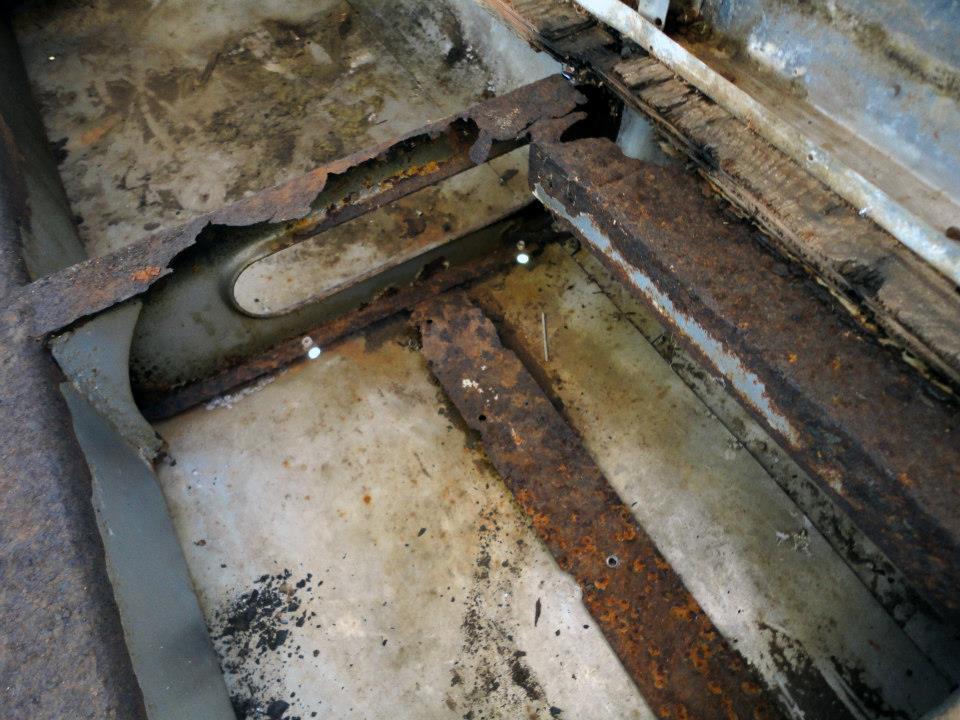

Before the frame was ready to paint we had to use a grinder to remove as much surface rust as possible from the entire trailer frame, then clean it all with a degreaser to prepare it to be sealed.
Here’s the automotive rust preventative paint we used, as recommended by other Airstream renovators on Air Forums:

The paint requires at least two coats and 2-6 hours for each coat to dry, preferably in a well-ventilated, temperate environment with lower humidity. Waiting for the right conditions was crucial to doing this right the first – and preferably only – time.
It was a somewhat messy, tedious process. Wear old clothes that you plan to throw away, plus gloves, a mask, and safety glasses – this paint is serious business. Painting while upside down and beneath the trailer without getting paint everywhere was especially challenging.
All that aside, it looks so much better, and most importantly it should never rust again! The steel looks and feels like enameled cookware now, instead of tetanus-covered sandpaper. It’s almost a shame to cover it with a floor now!


We also sanded and painted the tongue and bumper (which is just an extension of the trailer frame) with rust preventative, then added a clear sealant to protect against UV exposure. It looks much better in black than it did in rusty silver!


And with that huge task now marked off the to-do list, the next step is cutting, sealing, and installing the new wood subfloor. That’s going to be a heck of a precise job and likely to involve the help of many friends and family members (who may or may not will be enticed with food and beer!).
