
With the frame prep work finally done – after what seemed like ages – it was time to install the new trailer subfloor! I don’t even remember what it was like to walk in the trailer without balancing precariously on steel beams. I have a new respect for gymnasts, for sure.

The wood for the subfloor was purchased from a local lumber yard. I chose 1/2″ 5-ply exterior-grade sheathing that was cured and stored indoors for a long period of time. The flatter and drier the wood is, the better the floor will install and last over time. Wood from the “big box” hardware stores often isn’t cured long enough or stored out of moisture, so it becomes warped, or shrinks and expands after installation as it dries out.

After a lot of research, I opted against marine grade wood and instead am treating it with a borate-based (non-chemical) pre-treatment from another local company, Nisus, to prevent mold, mildew and insect infestations. I doubled up the floor’s protection by sealing the bottom and edges with a low-odor (and VOC), oil-based primer.

The actual finished flooring is going to be 12″ x 24″ cork tiles glued directly on top of the subfloor.

I was very grateful to be able to borrow a family member’s wood shop (thank you, Tony!) and tools to cut the pieces of subfloor. If there’s anything I’ve learned from renovating a 100-year-old house and now this nearly 50-year-old Airstream, it’s to never assume anything is square, plumb or level! Even after careful measurements and templates, there were still a lot of adjustments to make when the time came to install it!

Using sheets of foam insulation as a template for cutting the rounded floor corners worked quite well. Those will be reused later to insulate under the subfloor. It was easier to test-fit the insulation – and shave off any adjustments to the curved parts with a knife – than to keep cutting the actual plywood incrementally to fit.


With several helpers to stabilize the trailer and position the flooring, we jacked the Airstream shell up off its frame a few inches to be able to sandwich the new flooring between the two halves. 2×4 framing and poles were used under the sturdiest ceiling support beams, at the the front and rear of the trailer, connected to floor jacks on the ground.
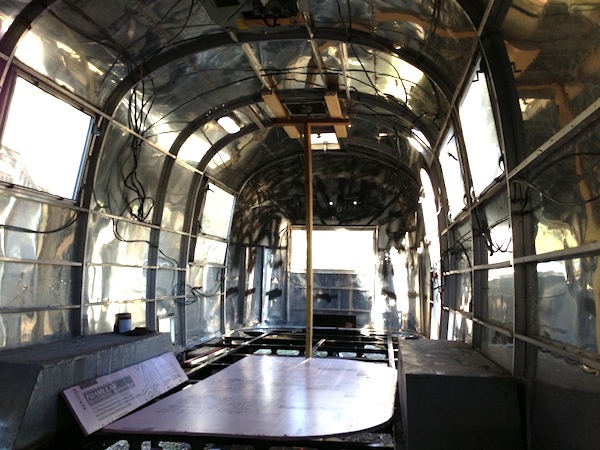


Installation took two days, several people, lots of wiggling, cursing, and adjustments with a sander and jigsaw – but it’s in. It was a terrifying experience, watching all that aluminum teetering around freely in the air! I am not one bit upset that it’s safely back down on the floor and frame now.
I’m also so excited just to be able to easily walk inside the trailer again for the first time in many months. It was also the dogs’ first time ever in the trailer, and my first time sitting or laying down on the floor, just because it was too icky to want to previously! 😆


One very exhausting weekend later, another huge job is off the list. Time for some much-needed rest! 😴

What is that black spray you used on the seams? I have been looking for someone who has had luck with something like that before I put my inner skins back up. Thanks in advance!
Hi Cameron! I added some spray on rubber that’s used for lining leaky gutters on houses. I’m not sure how much good it did since I didn’t have any major water leaks even when the skins were out, but I figured it couldn’t hurt. Then I sealed the exterior seams as needed where the caulk had cracked with this clear sealant http://www.captaintolley.com/.